Configuring an API Gateway
Jose Montoya
As many organizations are starting to leverage Mulesoft API Manager and API Gateway for securing public and private APIs, it’s important to understand the process for setting up your API Gateway and establishing your tokens needed to test these out. This blog will walk you through the steps required to establish your API Gateway project.
Steps to Configuring an API Gateway:
- Add a new API
- Create API Definitions (RAML)
- Deploy Mule Application to CloudHub
- Create New Portal
- Request API Access
- Configure Gateway Endpoint
- Apply Policies
- Add A New API – In the Anypoint Platform, under the API Administration tab, choose Add new API and fill out your API name and version.

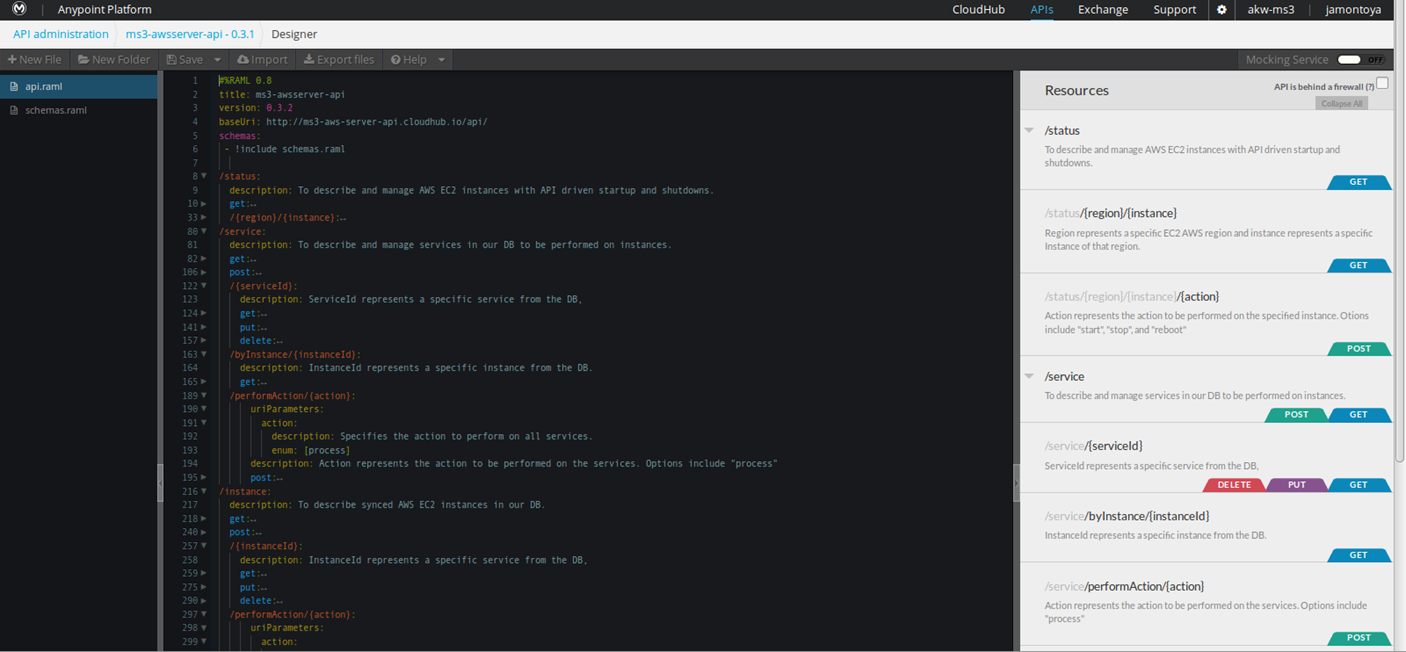
- Create API Definition – Once inside the created API page, choose Edit in API Designer.
 Here you will create the RAML definition and Save.
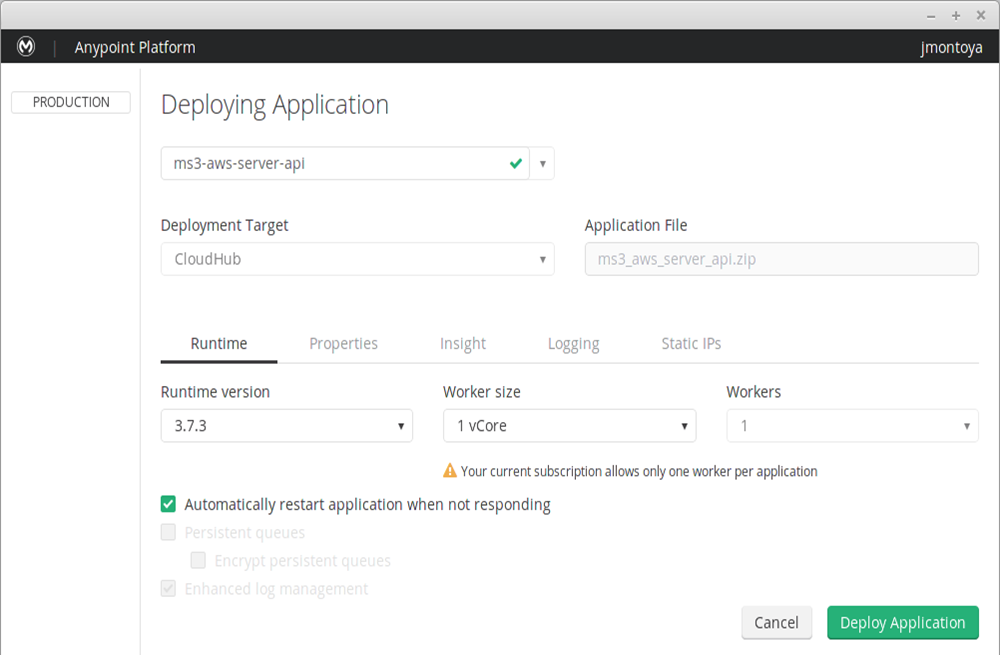
- Deploy Mule Application – Deploy your mule application to Cloudhub from Anypoint Studio.
Check on the application from the CloudHub Tab in the Anypoint Platform. Take note of the app URL.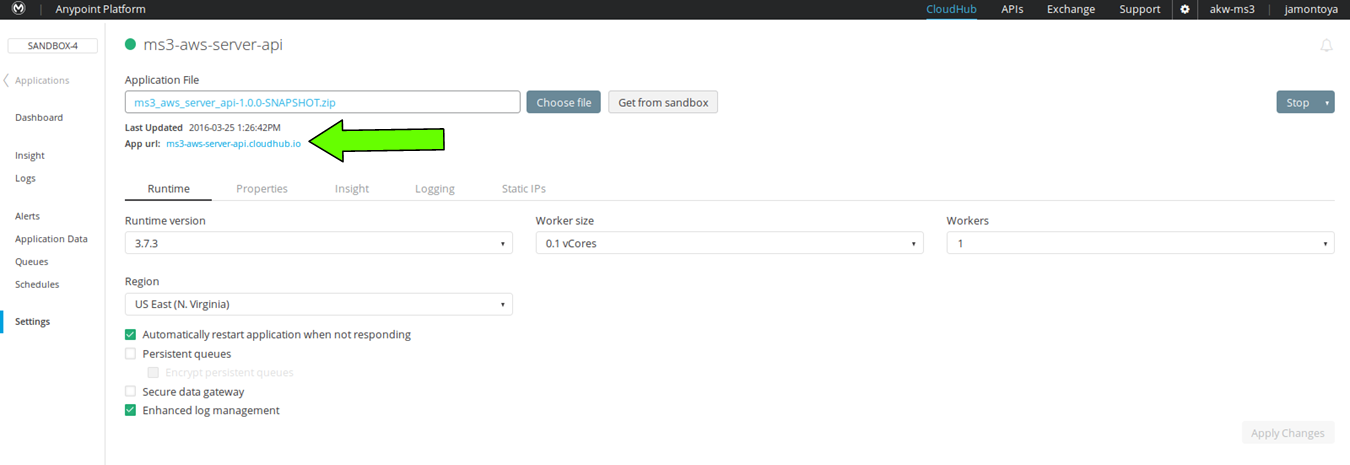
- Create A New Portal – Back in the API page, choose Create New Portal under the API Portal section.

- Request API Access-In the Portal page choose to preview the Live Portal.
 In the live portal you will Request API Access.
- Configure Gateway Endpoint-Choose Configure Endpoint in the API Status section.
 Here Implementation URI is the app url you got from Step 3. Check to Configure Proxy for CloudHub an Save.
 Review the information and select the CloudHub environment to deploy the Gateway and Deploy.
- Add Policies-Back in the API page, apply Specific Policies from the Policies section. Each policy will create a dialog requesting the necessary information for that particular policy.

Now that you have created your API and configured your API proxy, the policies will each have different applications that may impact your RAML. For example, if you’re using Client_ID enforcement you will need to add the RAML Snippet provided to your RAML file that will specify where these elements are to be located within the inbound message.
Look forward to our NEXT blog that will cover Policy Application to APIs.
Resources:
Mule: Create an API
RAML: Tutorial
Mule: Deploy to CloudHub
Mule: Configuring an API Gateway


Leave a Reply